When writing this blog post, the Power BI REST API version was v1.0 and the Power BI connector for the logic app was still an in preview feature. This post is intended to help overcome some of the blockers you might hit when following the Microsoft documentation as it didn’t really advise on how to overcome some of the issues I faced, possibly because the technology is still so new and in preview
Requirements
- Microsoft Azure AD and admin access (register app and create security group)
- Microsoft Power BI Pro Account (you can get a 30day free trial)
- Postman (To easily perform REST requests to the API)
1. Setup App And Security Group (Azure AD)
As a starting point, I recommend reading over the Power BI Automation Documentation from Microsoft and start with the first step of registering an app and creating a security group. There are multiple ways of doing this from the registration tool, Azure CLI, or manually in the portal.
After you create the App you can create a secret and copy the application ID found on the overview page of the app we just registered.
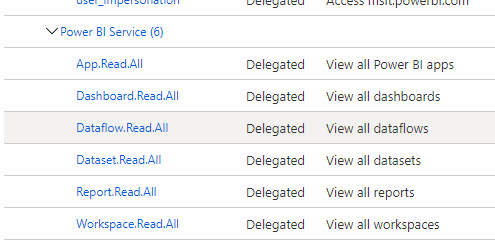
You should grant the app API permissions to the Power BI service using delegated permissions
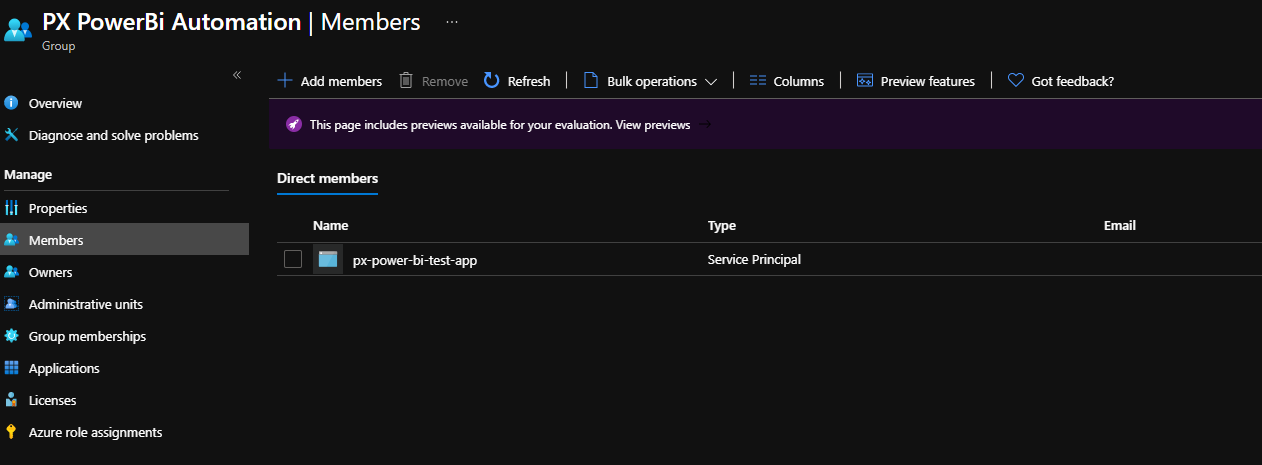
After you finished creating the app, go over to the Azure AD and create a new security group and then add the app/service principle we created as a member of that security group.
2. Get an authentication access token
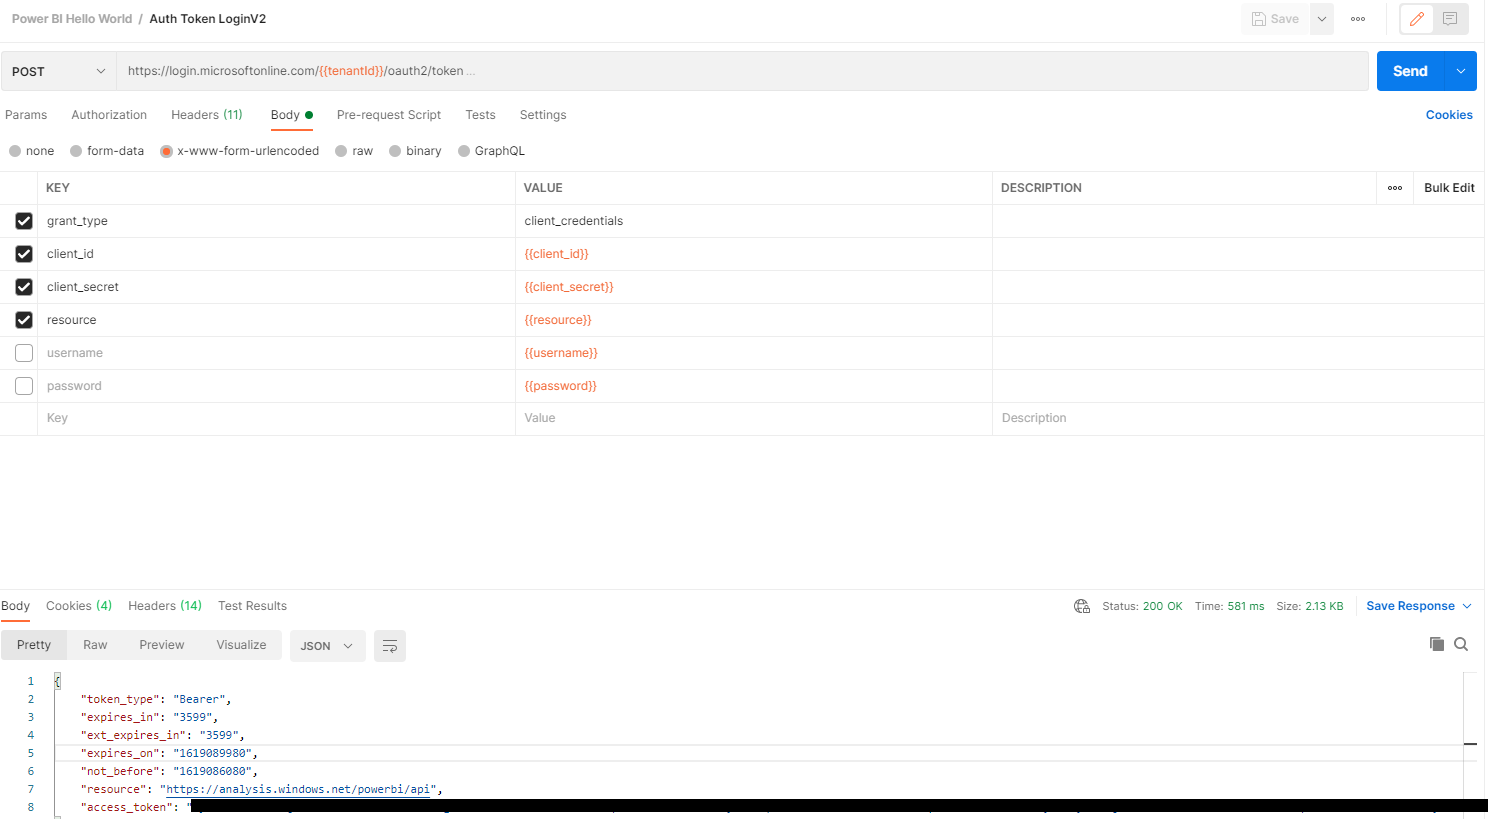
To get an authentication token, the documentation goes through an example using a .Net Console application. In my example below, I’m going to call off to the login.microsoftonline.com endpoint with a POST request with postman to acquire my access token
Endpoint : https://login.microsoftonline.com/{{tenantId}}/oauth2/token
you can get the tenant id and all the other information from the app you registered in section 1
Hint
If you change permissions on the app you registered in Azure in section 1 then you will need to acquire a new authentication token before the updated permissions take effect
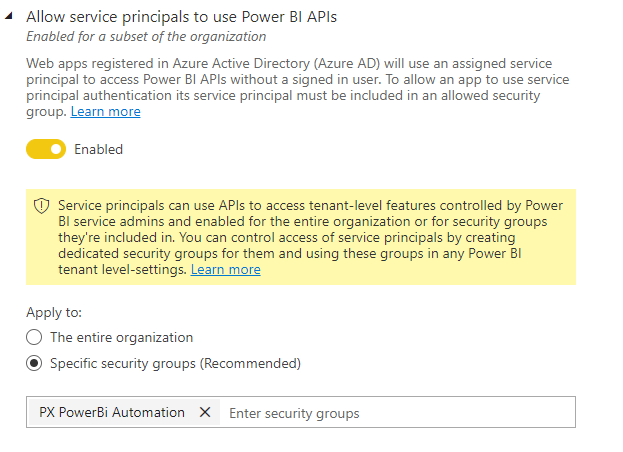
3. Enable Power BI API Access
One setting the Microsoft documentation doesn’t tell you about is you need to enable the Power BI API settings inside the Admin Portal section of Power BI (you will need admin access to do this). Enabling this feature will take 15 minutes to take effect.
403 – “API is not accessible for application
If you see this error it either means you’re targetting the organisation workspace, “My Workspace” or you haven’t given your app the required permissions in Azure AD.
3. Create Dataset Using Power BI Rest API
The dataset needs to be created by the registered app or if you decide to skip this step and create the dataset manually then you need to make sure you set the owner of the dataset to be the app otherwise we can’t access it or view it later using the logic app
Warning
Microsoft documentation suggests creating a new dataset on the organisation level endpoint https://api.PowerBI.com/v1.0/myorg/datasets
but I would avoid this as you will probably run into permission issues and be given a 401 response code.
I recommend you create the dataset in a new workspace and use the group URL instead. The group_id is the dataset id, you can get this off the query string in the Power BI portal online
https://api.PowerBI.com/v1.0/myorg/groups/{group_id}/datasets
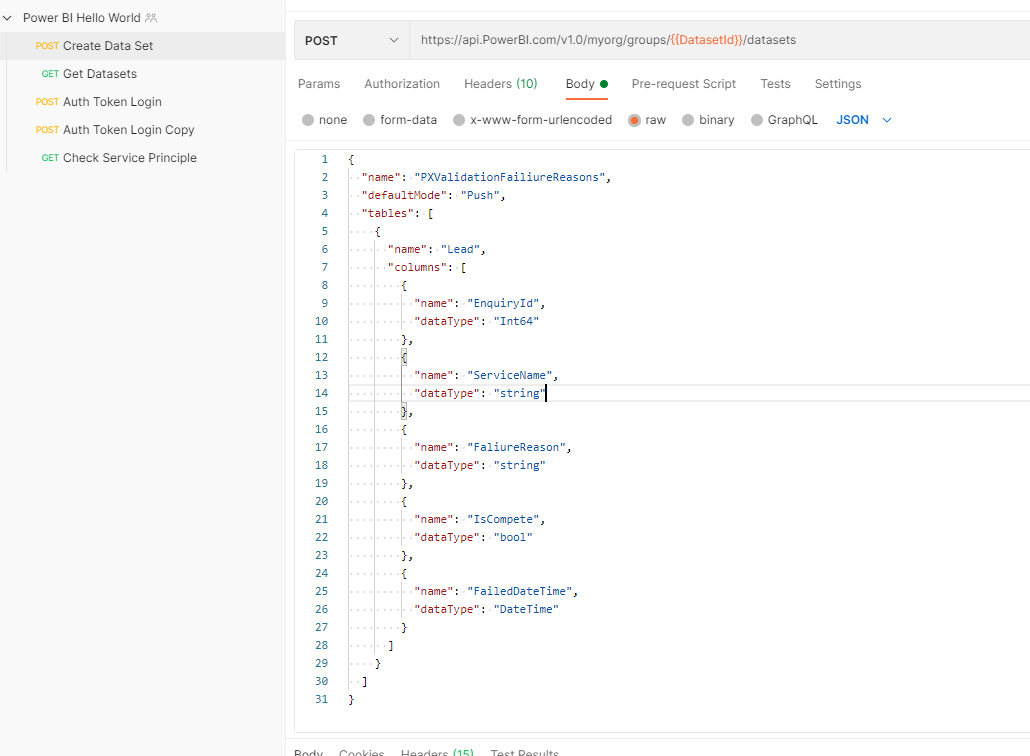
The screenshot above shows a rest request we publish to Power BI’s rest API to create our dataset. You will need to use the Auth Token provided in section 2. You should get a 201 response code back meaning that the dataset was successfully created.
3. Push data into the dataset using a Logic App (In Preview)
In my logic app, I’m reading messages from a service bus queue and then looping through each result. IF a field within the message has been assigned, in my case the failure message then I am sending this to the Power BI dataset using the connector.

Select the “Add rows to a dataset” action for Power BI.
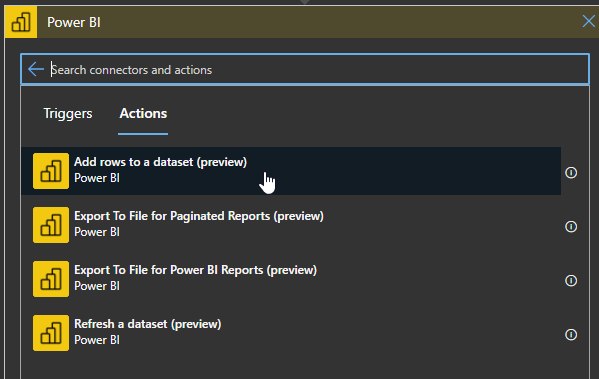
You should be able to see a drop down for each of the required options. Select the workspace of the dataset you want to populate with the data and also the dataset and table name. You can also use the Dataset ID if you want to populate it manually instead of using the drop down.

HINT
If the Dataset doesn’t appear make sure that the app is the owner of the dataset in Power BI and all permissions have been enabled on the service principle
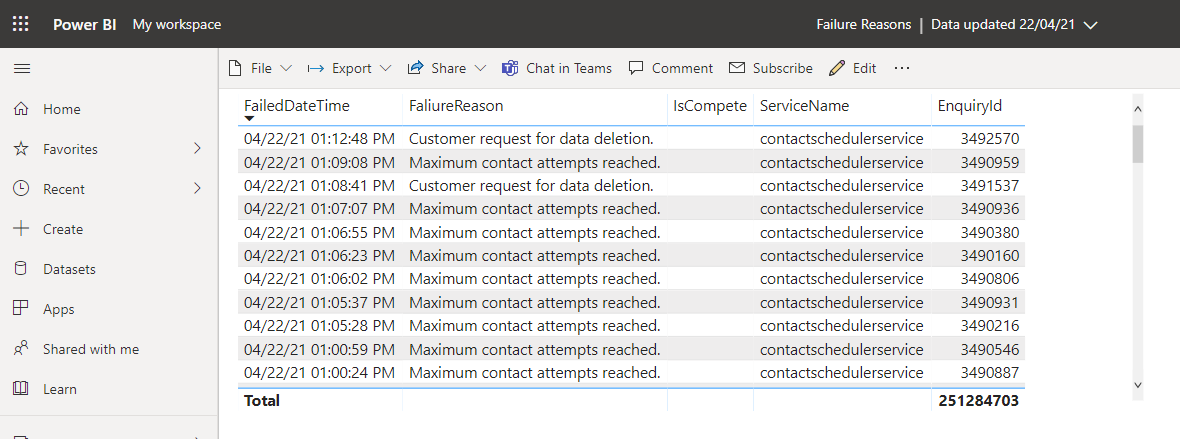
Conclusion
Once the logic app runs your dataset will instantly have access to the imported data! If you create a report on top of the dataset you can see the data we imported using this logic app connector and the Power BI Rest API
Benefits
one of the benefits of this approach is the logic app connectors, using a Logic App I can pull data from any data source such as Application Insights, Elastic Search, SQL Database, Redis.. the list goes on.. and easily push it into a dataset that our reporting team can have access to.
We didn’t need to create any databases to hold the data so this saved time and hosting costs, although I’m not sure how much Power BI cost for ingesting the dataset.
Easily create any shape of dataset using a simple Rest request and populate the data from multiple data sources using logic app is extremely powerful
You don’t need to create a scheduled refresh task like you would if you was querying a SQL database. You can simply refresh your reports because the dataset gets updated instantly
Cons
One thing to be aware of is the Power BI Rest API has a rate limit of 100 requests every 60 seconds so it’s worth bulk inserting data if you plan on inserting large amounts.